Leaderboard
Popular Content
Showing content with the highest reputation on 06/04/2017 in all areas
-
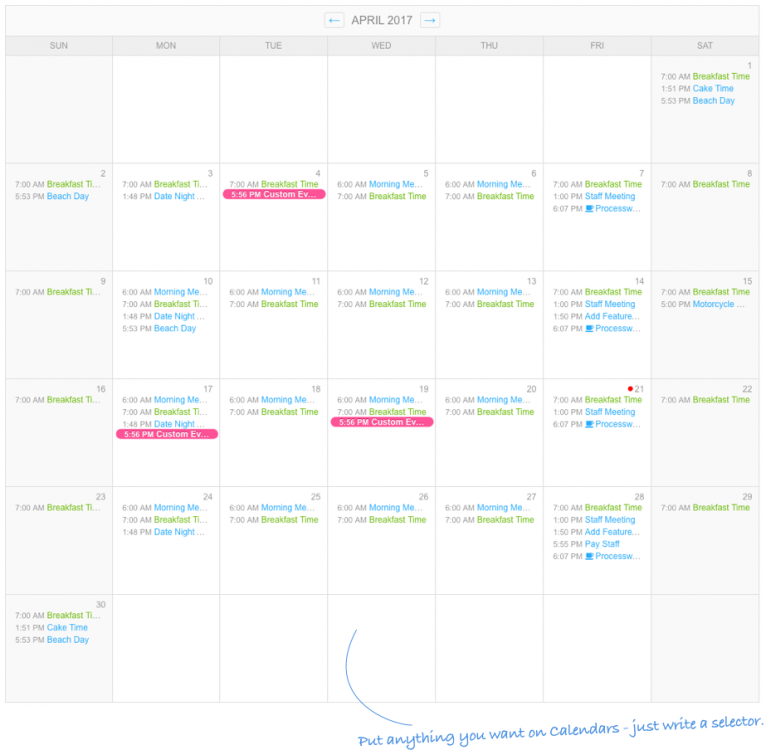
hello @gebeer it is possible to add as much dates as you want to one day (fe. 100 or more if you want). You only have to create one event (page) for each of your events and make them recurring to your needs. So from the module there are no restrictions. It also doesnt matter if the starting and ending time of several events are the same on the same day. On the calendar view only few events are displayed for this day (depending on the space in the calendar row - see next image on the 6th). All others will be overflown. After hovering the calendar cell all events on that day will be displayed. If you are entering fe 100 events on that day (and I am sure you would probably not ) the list will be very long, but technically it would be possible. There are a lot of recurrence possiblilities fe. the first and the last day of a month every second monday every month,.... take look at the documentation. Jürgen3 points
-
Wire Mail SMTP An extension to the (new) WireMail base class that uses SMTP-transport This module integrates EmailMessage, SMTP and SASL php-libraries from Manuel Lemos into ProcessWire. I use this continously evolved libraries for about 10 years now and there was never a reason or occasion not to do so. I use it nearly every day in my office for automated composing and sending personalized messages with attachments, requests for Disposition Notifications, etc. Also I have used it for sending personalized Bulkmails many times. The WireMailSmtp module extends the new email-related WireMail base class introduced in ProcessWire 2.4.1 (while this writing, the dev-branch only). Here are Ryans announcement. Current Version 0.8.0 (from 2024-09-25 -- initial version 0.0.1 was pushed on 2014-03-01) Changelog: https://github.com/horst-n/WireMailSmtp/blob/master/CHANGELOG.md Downlod: get it from the Modules Directory || fetch it from Github || or use the module-installer in PWs admin site modules panel with its class name "WireMailSmtp". Install and Configure Download the module into your site/modules/ directory and install it. In the config page you fill in settings for the SMTP server and optionaly the (default) sender, like email address, name and signature. You can test the smtp settings directly there. If it says "SUCCESS! SMTP settings appear to work correctly." you are ready to start using it in templates, modules or bootstrap scripts. Usage Examples The simplest way to use it: $numSent = wireMail($to, $from, $subject, $textBody); $numSent = wireMail($to, '', $subject, $textBody); // or with a default sender emailaddress on config page This will send a plain text message to each recipient. You may also use the object oriented style: $mail = wireMail(); // calling an empty wireMail() returns a wireMail object $mail->to($toEmail, $toName); $mail->from = $yourEmailaddress; // if you don't have set a default sender in config // or if you want to override that $mail->subject($subject); $mail->body($textBody); $numSent = $mail->send(); Or chained, like everywhere in ProcessWire: $mail = wireMail(); $numSent = $mail->to($toEmail)->subject($subject)->body($textBody)->send(); Additionaly to the basics there are more options available with WireMailSmtp. The main difference compared to the WireMail BaseClass is the sendSingle option. With it you can set only one To-Recipient but additional CC-Recipients. $mail = wireMail(); $mail->sendSingle(true)->to($toEmail, $toName)->cc(array('person1@example.com', 'person2@example.com', 'person3@example.com')); $numSent = $mail->subject($subject)->body($textBody)->send(); The same as function call with options array: $options = array( 'sendSingle' => true, 'cc' => array('person1@example.com', 'person2@example.com', 'person3@example.com') ); $numSent = wireMail($to, '', $subject, $textBody, $options); There are methods to your disposal to check if you have the right WireMail-Class and if the SMTP-settings are working: $mail = wireMail(); if($mail->className != 'WireMailSmtp') { // Uups, wrong WireMail-Class: do something to inform the user and quit echo "<p>Couldn't get the right WireMail-Module (WireMailSmtp). found: {$mail->className}</p>"; return; } if(!$mail->testConnection()) { // Connection not working: echo "<p>Couldn't connect to the SMTP server. Please check the {$mail->className} modules config settings!</p>"; return; } A MORE ADVANCED DEBUG METHOD! You can add some debug code into a template file and call a page with it: $to = array('me@example.com'); $subject = 'Wiremail-SMTP Test ' . date('H:i:s') . ' äöü ÄÖÜ ß'; $mail = wireMail(); if($mail->className != 'WireMailSmtp') { echo "<p>Couldn't get the right WireMail-Module (WireMailSmtp). found: {$mail->className}</p>"; } else { $mail->from = '--INSERT YOUR SENDER ADDRESS HERE --'; // <--- !!!! $mail->to($to); $mail->subject($subject); $mail->sendSingle(true); $mail->body("Titel\n\ntext text TEXT text text\n"); $mail->bodyHTML("<h1>Titel</h1><p>text text <strong>TEXT</strong> text text</p>"); $dump = $mail->debugSend(1); } So, in short, instead of using $mail->send(), use $mail->debugSend(1) to get output on a frontend testpage. The output is PRE formatted and contains the areas: SETTINGS, RESULT, ERRORS and a complete debuglog of the server connection, like this one: Following are a ... List of all options and features testConnection () - returns true on success, false on failures sendSingle ( true | false ) - default is false sendBulk ( true | false ) - default is false, Set this to true if you have lots of recipients (50+) to ($recipients) - one emailaddress or array with multiple emailaddresses cc ($recipients) - only available with mode sendSingle, one emailaddress or array with multiple emailaddresses bcc ($recipients) - one emailaddress or array with multiple emailaddresses from = 'person@example.com' - emailaddress, can be set in module config (called Sender Emailaddress) but it can be overwritten here fromName = 'Name Surname' - optional, can be set in module config (called Sender Name) but it can be overwritten here priority (3) - 1 = Highest | 2 = High | 3 = Normal | 4 = Low | 5 = Lowest dispositionNotification () or notification () - request a Disposition Notification subject ($subject) - subject of the message body ($textBody) - use this one alone to create and send plainText emailmessages bodyHTML ($htmlBody) - use this to create a Multipart Alternative Emailmessage (containing a HTML-Part and a Plaintext-Part as fallback) addSignature ( true | false ) - the default-behave is selectable in config screen, this can be overridden here (only available if a signature is defined in the config screen) attachment ($filename, $alternativeBasename = "") - add attachment file, optionally alternative basename send () - send the message(s) and return number of successful sent messages debugSend(1) - returns and / or outputs a (pre formatted) dump that contains the areas: SETTINGS, RESULT, ERRORS and a complete debuglog of the server connection. (See above the example code under ADVANCED DEBUG METHOD for further instructions!) getResult () - returns a dump (array) with all recipients (to, cc, bcc) and settings you have selected with the message, the message subject and body, and lists of successfull addresses and failed addresses, logActivity ($logmessage) - you may log success if you want logError ($logmessage) - you may log warnings, too. - Errors are logged automaticaly useSentLog (true | false) - intended for usage with e.g. third party newsletter modules - tells the send() method to make usage of the sentLog-methods - the following three sentLog methods are hookable, e.g. if you don't want log into files you may provide your own storage, or add additional functionality here sentLogReset () - starts a new LogSession - Best usage would be interactively once when setting up a new Newsletter sentLogGet () - is called automaticly within the send() method - returns an array containing all previously used emailaddresses sentLogAdd ($emailaddress) - is called automaticly within the send() method Changelog: https://github.com/horst-n/WireMailSmtp/blob/master/CHANGELOG.md1 point
-
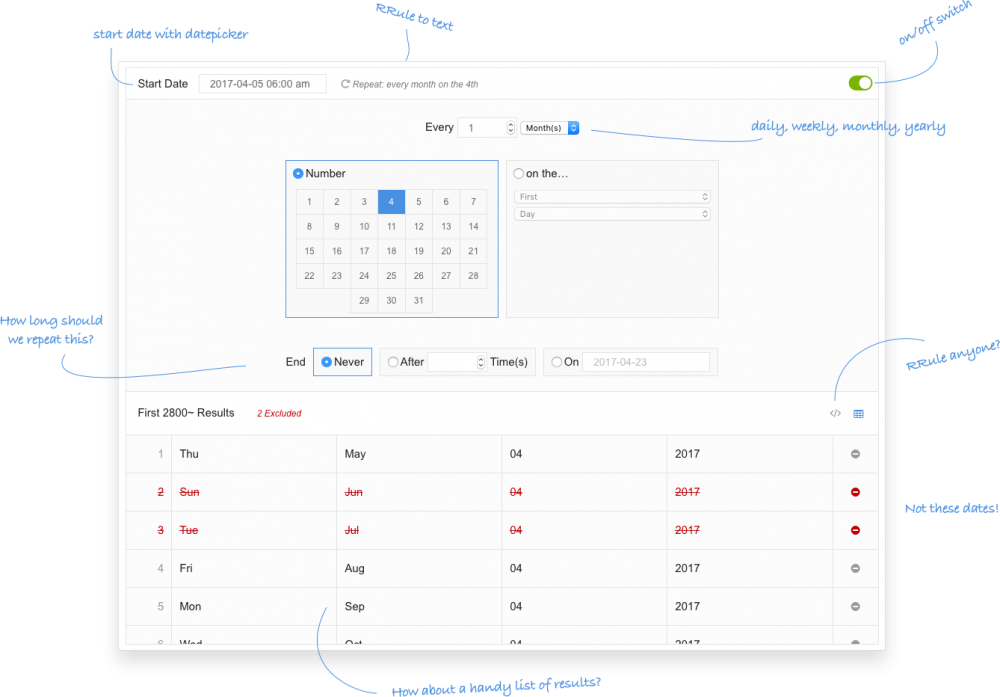
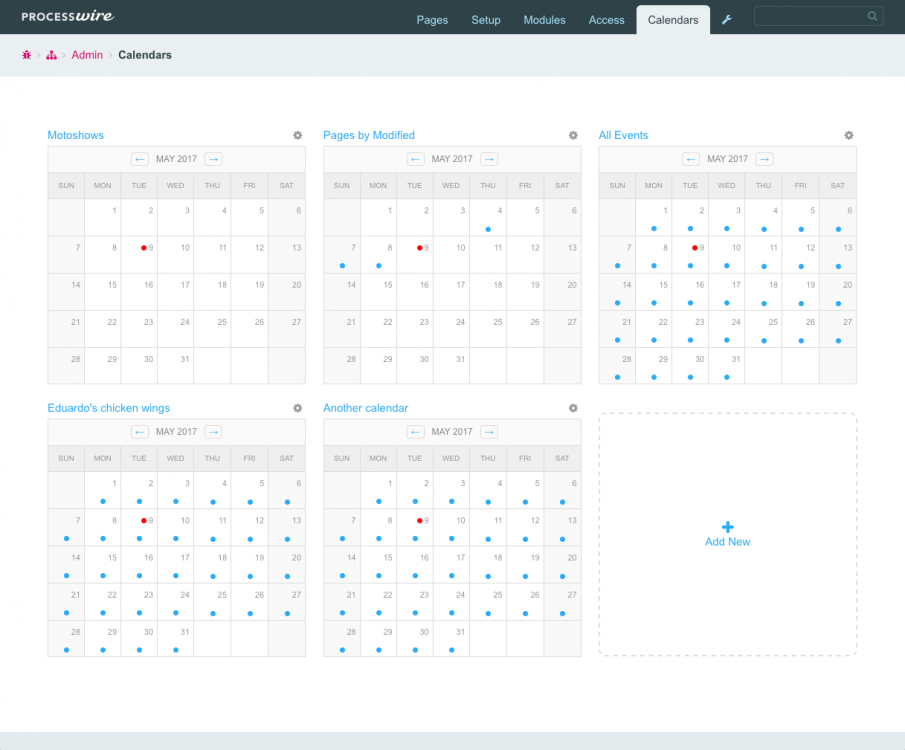
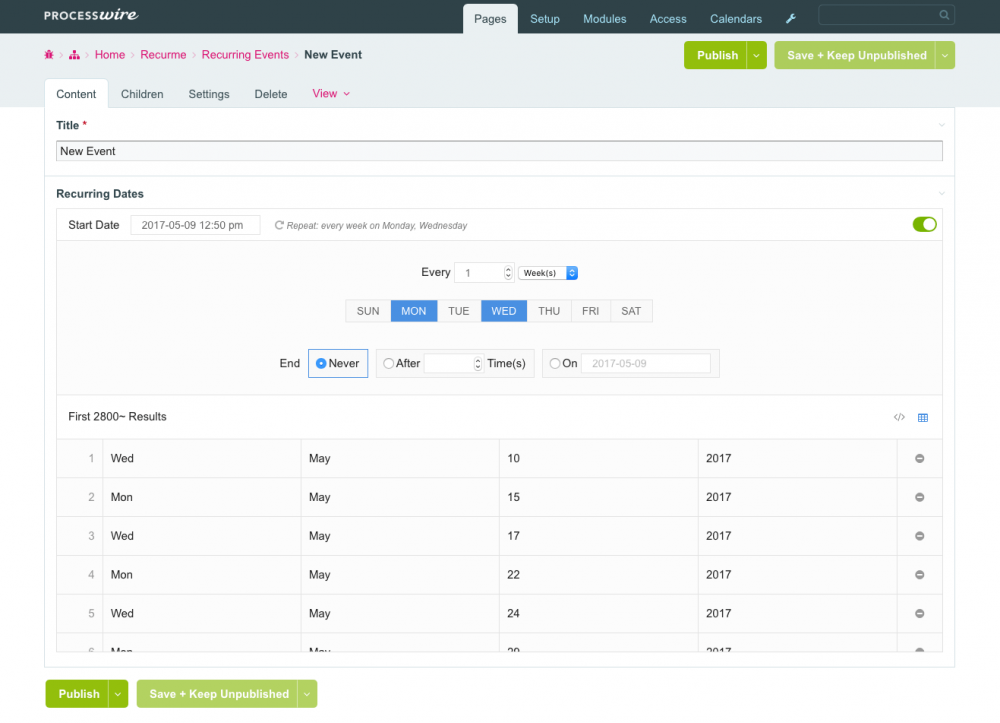
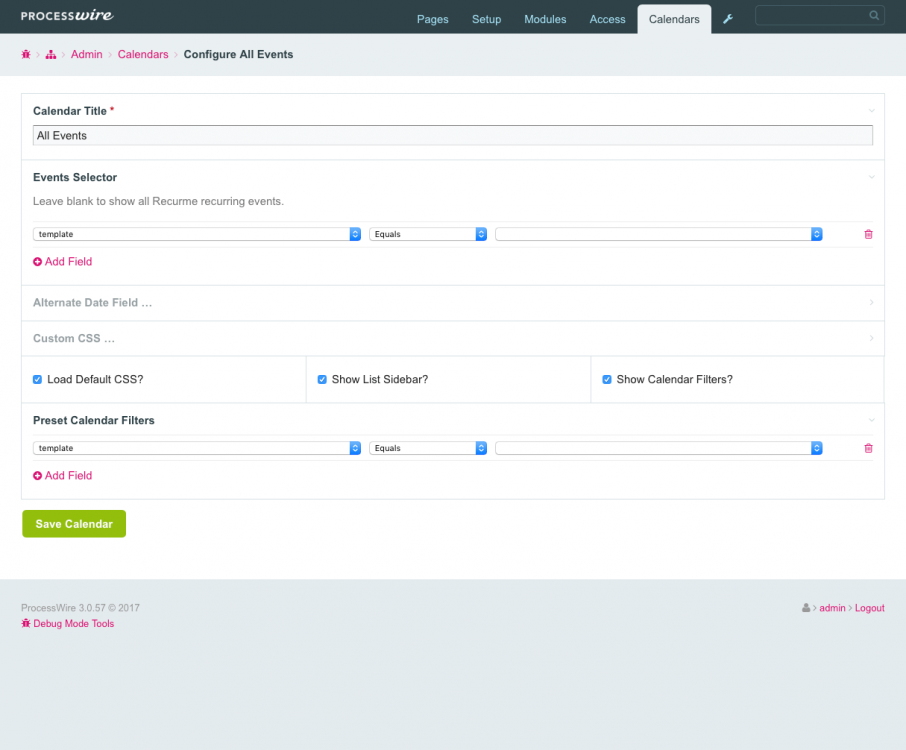
Introducing our newest [commercial] module: Recurme Processwire Recurring Dates Field & Custom Calendar Module. http://www.99lime.com/modules/recurme/ One Field to Recur them ALL… A Recurring Dates InputField for your Processwire templates. The InputField you’ve been waiting for. Complex RRule date repeating in a simple and fast user interface. Use the super simple, & powerful API to output them into your templates. example: <? // easy to get recurring events $events = $recurme->find(); // events for this day $events = $recurme->day(); // events for this week $events = $recurme->week(); // events for this month $events = $recurme->month(); ?> <? // Loop through your events foreach($events as $event){ echo $event->title; echo $event->start_date; echo $event->rrule; echo $event->original->url; ... } ?> Unlimited Custom Calendars. Imagine you could create any calendar you wanted on your website. Use recurring events with the Recurme field, or use your own Processwire pages and date fields to render calendars… it’s up to you. Fully customizable. Make as many calendars as you like. Get events from anywhere. Recurme does all the hard date work for you. Unlimited Custom Admin Calendars too. Hope you like it , Joshua & Eduardo from 99Lime. ## [1.0.1] - 2017-05-29 ### changed - Fixed $options[weekStartDay] offset in Calendar - Fixed ->renderCalendar() Blank Days - Fixed missing ->renderList() [renderMonth][xAfter] - Removed ->renderCalendar() <table> attributes border, border-spacing - Fixed ->renderCalendar() excluded dates - Fixed rrule-giu.js exclude dates - Fixed ->renderList missing space in attr ID (shout out to @Juergen for multiple suggestions & feedback).1 point
-
Hello, I want to showcase my website made in processwire. https://chrysemys.nl/ Goal of the website There are quit some websites with information about turtles. Most of them are very limited in information. This website main goal is to be very complete in information. Information about turtles, there natural behaviour, detailed descriptions. Next is also associations ( (bi-)directional links) with caresheets, books, food, illnesses, etc... Second goal is to learn PHP as I started an education for application engineering 4 months ago. Setup It is build on the latest version (3.0.61) and makes use of the latest template strategy. I use the pw-append, pw-replace classes in combination with _main.php and several template files. Most of the rendering is done from custom functions in _functions.php. In the back-end the pages are styled with the options for visibility and group in logical blocks. This is a very nice feature with processwire and makes the pages easier to fill. Next to the core modules I have used the following extra modules: AIOM+ - obviously Connect Page Fields - This module is very important. The whole site is considered a relational database. The base is the enity turtle. This entity has bidirectional associations with books, caresheets, locations (voor google maps), regions (to group locations), the different classifications of the animal taxonomy, food, etc. To make these kind of associations it greatly simplified the output on the other templates. This module was a mandatory feature for being able to create a site as I wanted to. Otherwise it would it would be very inefficient to keep everything up to date. Now I can add a new book and connect it to one ore more turtles. After the save you can see the book also on the turtle page. This goes for all the bidrectional links. This page is about a species - https://chrysemys.nl/schildpadden/emys-orbicularis/ This species has several sub species (basicly the same turtle but live in another country/region and has some different charasteristics). I have decided to make no distinction between species and sub species (on a template level) and use this module to connect them to each other. One reason was that this way the url would not be too long. This turtle lives in several different habitats. These are also bidirectional associations. The same goed for food, books, food to mention some. The biological taxonomy is also build this way as entities that have no parent/child relation. They are connected to each other with page reference (in this case). Both methods (page reference or parent/child) have their pro's and cons, in the end this setup seemed to work best for me. Map Marker - This is used for the map marker field for the locations (verspreiding). Everyt turtle can live in one ore more locations and the will show up on the google map. Also I have the possibility to add location specific information about the climat on the pages (missing on almost all other websites). Map Markup (Google Maps) - For the output of the google map. The js script for this is only outputted on the pages where it is used (template strategy). Markup Sitemap XML - obviously Social Share Buttons - Added this as it is recommended for a better SEO score. Get Video Thumbnails - The blog story can have a youtube link. This module automatically grabs an image and places it as the image for the blog. No more extra steps needed. Video embed for YouTube/Vimeo - I slight changed the output for this module so it always is placed under the body. Datamaps.js - Also I had some very important help from @adrian with help of using datamaps.js. This page is a datamaps script that read all turtles that live in the US and shows them in the correct state. https://chrysemys.nl/kaart-verenigde-staten/ A php function renders the output for the script and fills the variables. These are added to te script on rendering the page. The website is not finished and probably never will be as new information and functionality will be added all the time. But it is finished enough to serve as a showcase. Roadmap There are several things I want to add in the future: A find selector for overview pages (select by size, region, family, etc). Worked on this but, could not get it working. Datamaps.js for all regions (also with a selector to select another region). Optimize the queries to make the site faster. Several front-end improvements (marging/padding/font-size, etc...)1 point
-
Hi HMCB, Lates pre-release is from 4/2017. i think this thread is quit because all the talking regarding to this module is done inside module support group where you can get access after purchasing the module. Ofc apeisa could put some updates here also for advertising purposes. As for my own experience the module works fine, we have use it for our shop and it offers everything we need.1 point
-
Many thanks. Sometimes I think that my brain it's broken because I think of that but I didn't actually "see" it so with your comment I could resolve. I work every day and later I am very tired. I put the code. I know it's a bit dirty but well, it's my blog and I don't mind very much. It's work and that's the only important thing. In the blog template, I wrote this code and now it works. <div id='content'> <?php echo ukHeading1(page()->title, 'divider'); $pages_not_blog = page()->children('limit=10'); foreach ($pages_not_blog as $page_not_blog) { if ($page_not_blog->name === "blog") { $posts = $page_not_blog->children('limit=10'); echo ukBlogPosts($posts); } } ?> </div>1 point
-
1 point
-
1 point
-
Hey all, yesterday evening I started playing with the new uikit admin theme and I have to say I really like the way @ryan has developed it, it's relatively easy to modifiy it further. It took me around 10 minutes to prepare the development pipeline (from installation, setup the build processes and grasp the directory structures), so I highly encourage every designer in here to get their hand dirty and start without any fear I'm going to post in this thread my progresses, since my will is to dedicate every evening 1 hour or so with the purpose to release a visually pleasing and stable admin theme. If you want to post your progresses in this thread too, you're welcome!1 point
-
Only just a thought: It would make more sense to offer only the possibillity to enter just a start date without a time. If there is a start time, there should also be an endtime. So if you remove the time setting from the inputfield for the date it means there is an event on that date which is all day long. If there is a need to restrict an event via a start and end time we can add 2 PW time fields to the template. This is the case if there is fe a course the starts and ends at a certain time. This looks better than using the time field from the module field for the starting time and another time field from another PW field type for the endtime (2 different fieldtypes with different looks). Another case would be that a store is fe closed on that day (inventory or something else). The shop is closed the whole day. So there is no need to enter a start time - it is an all day event. We dont need a start time in this case. Conclusion: I think a date only field without the possibility to add the time would be a better fitting solution in this case. If you want you can add 2 time fields to the template or not (depending on your needs). No mixin of 2 different fields necessary. Best regards1 point
-
Maybe this is an option as well: https://processwireshop.pw1 point
-
1 point
-
The hook doesn't create a page. The hook is called if a page is created. If you add a page with a repeater field in its template the hook is called twice, because 2 pages have been created. If you have 2 repeater fields Pages::added will be triggered 3 times and so on. This is not a bug.1 point
-
1 point


