Publish/Unpublish pages
Publish/unpublish, delete or move pages depending on dates and times using LazyCron.
JkPublishPages - ProcessWire module to publish/unpublish, delete/trash or move pages depending on dates and times
This module is intended to schedule pages depending on publishing date and times. You can determine when a page is published or unpublished by setting start and/or end date and time. After the publication end date has been reached, you can decide what should happen with this page.
There are several options, that can be selected:
- No, action - The statuts of the page will be just set to unpublished
- Move to trash - The page will be moved directly to the trash
- Delete permanently - The page will be deleted directly without moving it to the thrash before
- Move the page to a new parent - This could be useful if you want to move the page fe to an archive. In this case, the page is only moved to a new position within the page tree, but remains published so that it still can be viewed
Each of the options will only have an effect if a publication end date is set.
This module creates new input fields for entering dates and to select what should happen after the publication end date is reached. These fields can be added with one click to your desired templates and do not have to be added manually to each template.
Module configuration
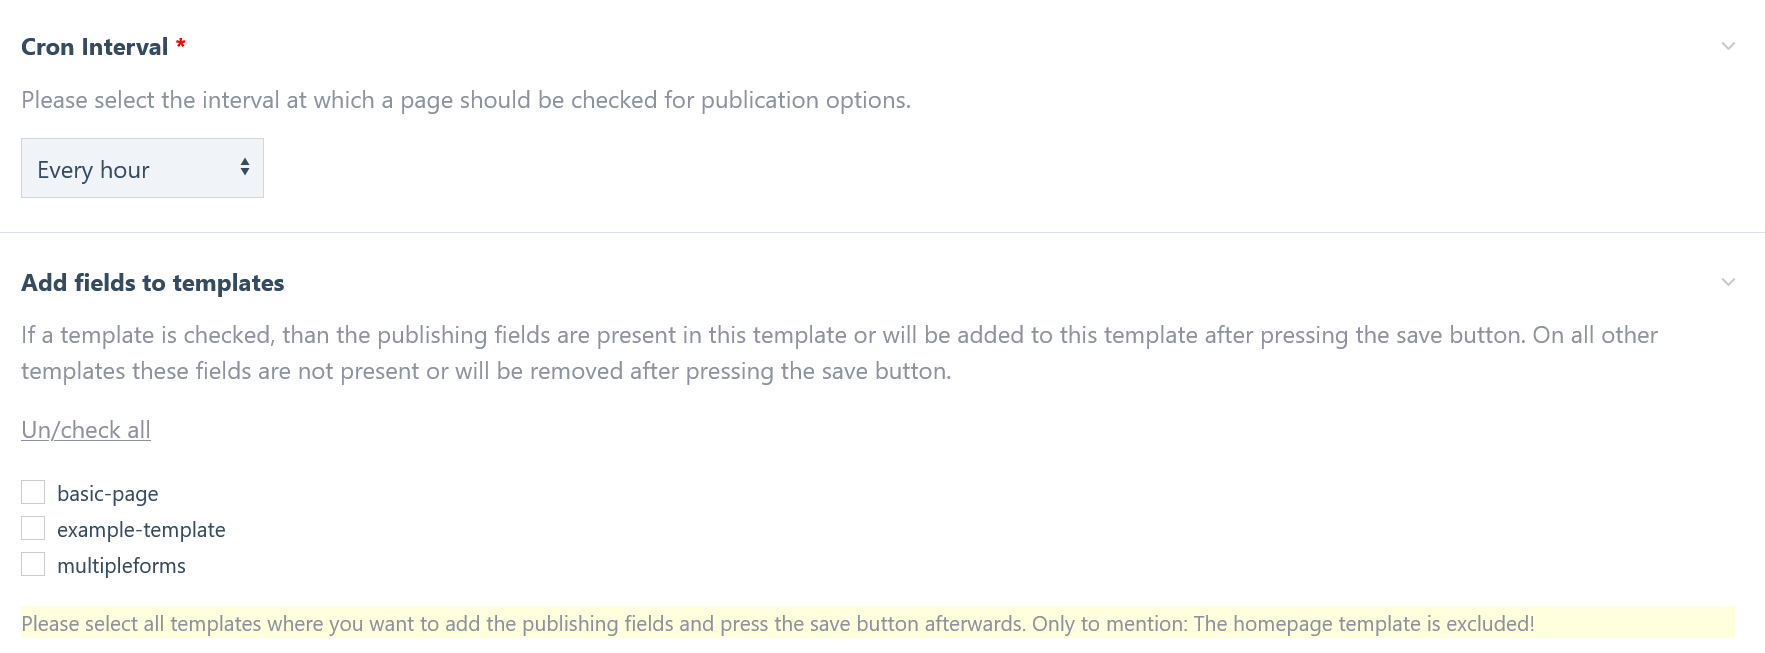
As you can see, you can choose from different LazyCron time intervals - default is 1 hour. Below is a list of checkboxes. Each checkbox represents a frontend template where you can add the publishing fields. If the checkbox of a template is checked, then the publishing fields will be added automatically to this template after saving the module configuration. On the opposite, the module fields will be removed from all templates where the checkbox is unchecked. So there is no the need to add/remove the necessary module fields manually to/from each template.
To enable/disable all checkboxes at once, you can use the toggle link (Un/check all) above the checkboxes. A little JavaScript allows toggling of all checkboxes at once. This makes it much easier and comfortable to add the fields to several templates.
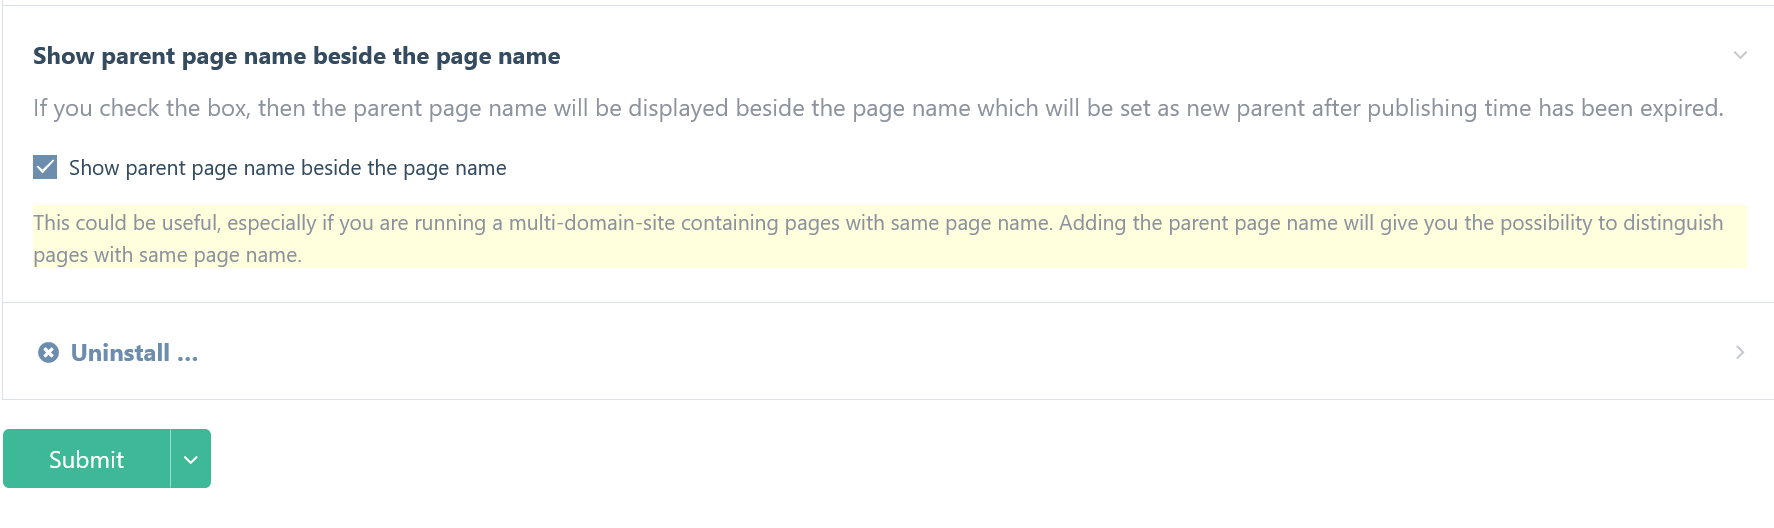
A new option to show the parent page name beside the page name inside the "new parent page select" has been added in version 1.3.3. Now you can choose if you want to show the parent page beside the default page name too or not. If you check the box inside the configuration, the parent page name will be displayed next to the page name. This happens inside the select input, where you can select a new parent after the publishing option has been expired. This is for the rare case if you have same page names by running a multi-domain installation, because this gives you the opportunity to distinguish the pages of the various domains. This configuration is not really needed if you are running a single website.
Take a look here:
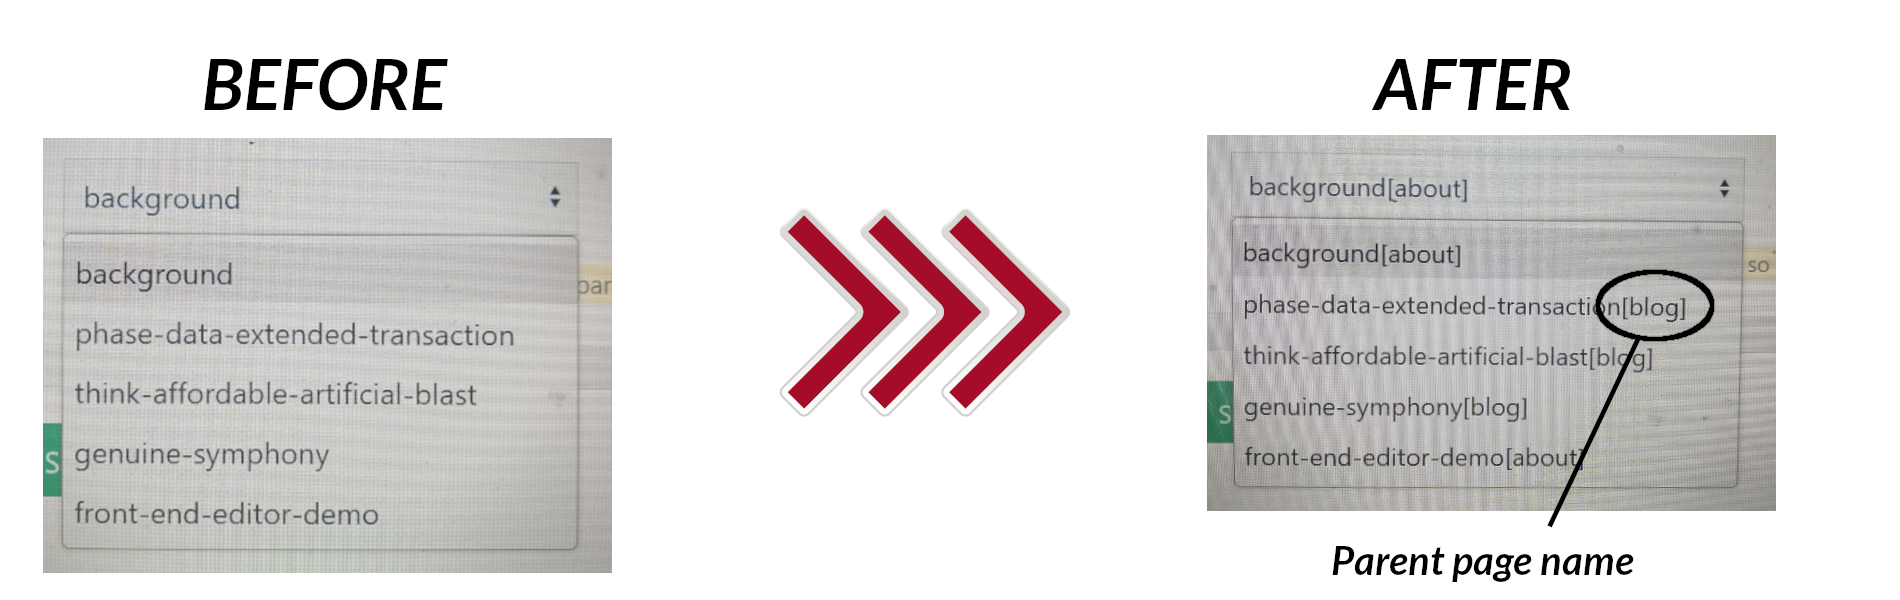
The name of the parent page will be added inside the parenthesis after the page name.
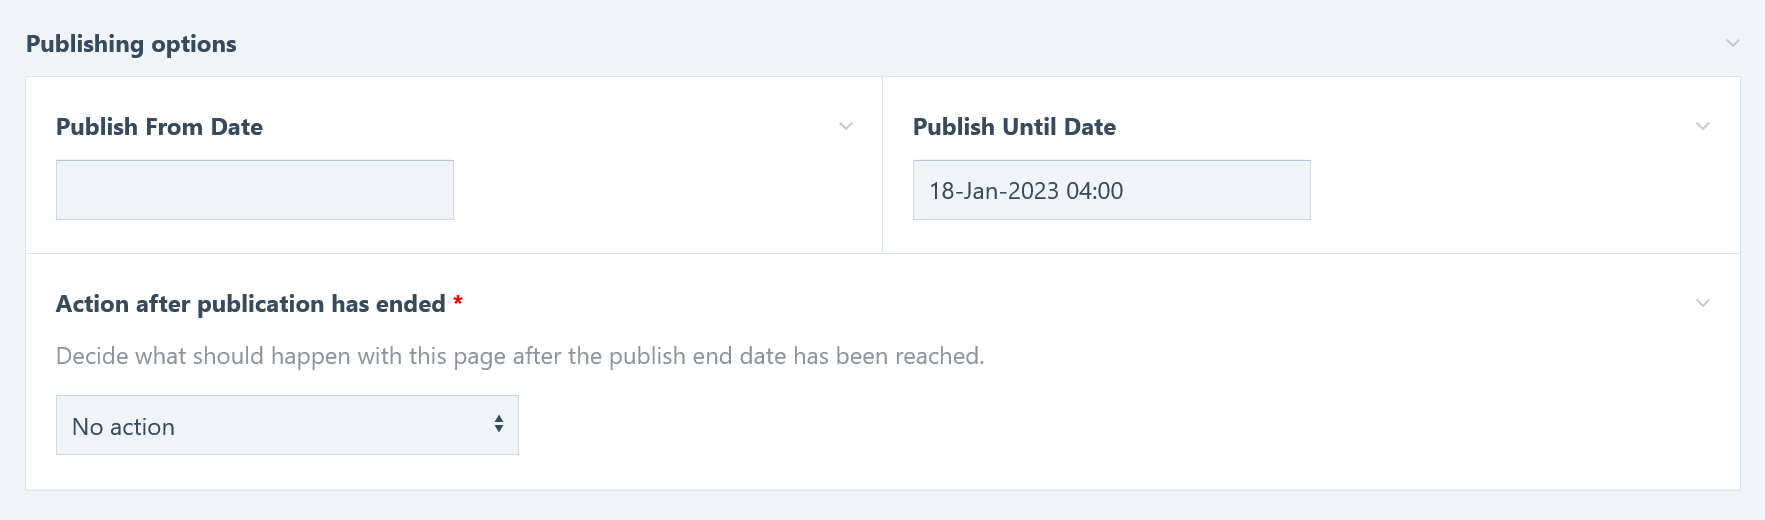
Template view
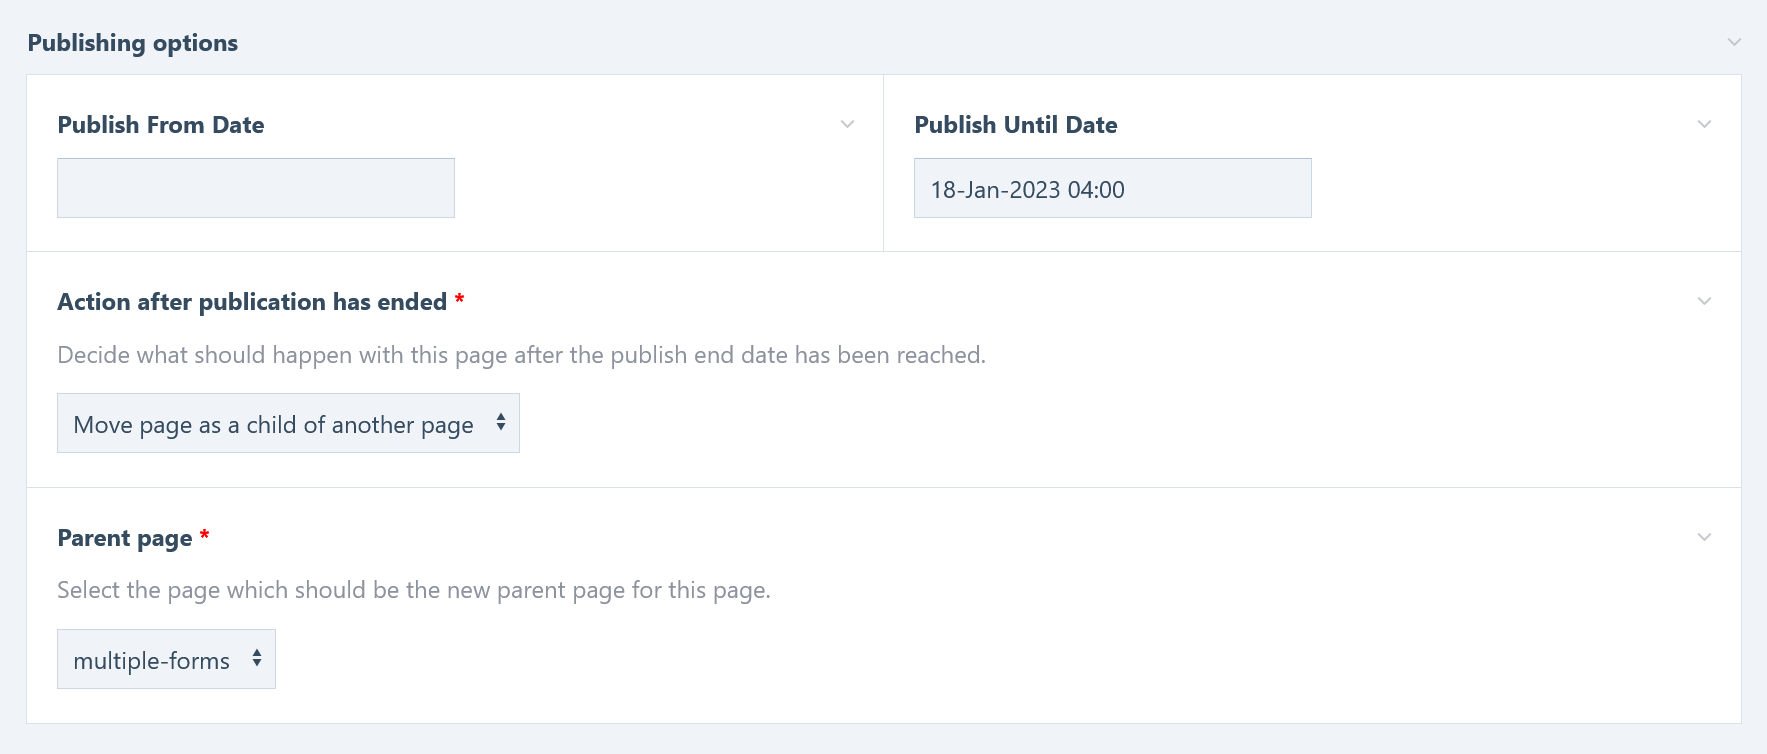
Every template, which was selected to use the publishing options includes the following fields:

If a publication end date has been set, an additional field will be displayed below. In this case, you can choose what should happen with the page after the publication end date is reached.
If you have selected the action to move the page to a new parent page, another input field appears where you can select the new parent page.
TIPP: If you have a very large site and a lot of pages will be listed inside the drop-down, it will be tedious to find the desired parent page. In this case, it is recommended to adapt the configuration of your templates to reduce the number of options (restrict the possible children and parent templates) - this should solve the problem.
Usage
Entering values inside the 2 date fields is optional.
- If you have entered no values inside the date/time fields means that the page is always visible.
- If you enter only a publishing from date means that the page will be visible from this date on and has no end date.
- If you enter only a publishing until date means that the page will be visible immediately after publishing until the end date is reached
- Entering both, start and end date means that the page is visible in the time range in between.
Customizing the module fields
If you want to change the labels of the input fields or the title of the fieldset, please go to the fields' configuration page and make your changes there.
But be aware: If you are using the language file of this module, this will overwrite all manual changes of the language values. This would be the case every time you install the language file manually (fe after updating a module).
Move page after publication end date is reached
As written in the introduction, you can decide what should happen with this page after the publication end date is reached.
Most options are self-explanatory, so I only want to focus on the option moving the page to a new parent and explain this option a little more in detail.
Each template has configuration options, which have an impact on parent and child pages. These options are:
- Allow children or not
- Allow/disallow certain templates to be a child of the page
- Allow/disallow certain templates to be a parent of the page
If you want to move a page to a new parent, these option will affect the choice if the desired parent page can be used as parent for the current page or not. This module takes care of these restrictions and offers you only those pages, which fulfill all requirements to be the new parent.
In other words, the options of the select field for the parent page are generated dynamically and can differ from page to page (or template to template).
If there are no selectable pages, because no page fulfill the requirements to be a new parent for the current page, then the option to move the page to a new parent is no longer visible inside the drop-down select for the further action after the publication end date is reached. In addition, the select field, where possible parent pages can be selected, will be hidden completely.
As you can see, the module takes care of all and offers you only possibilities, that can be used according to your settings.
But there is one thing to mention in this case: If you change your template settings later on, and you have chosen a parent page which will no longer be allowed to be a parent page, the movement will not take place. So be aware of changing template settings later on - in this case you have to check all your pages manually if the change will affect the page or not. But this is a very rare scenario, because the template settings will be done at the beginning and will not be changed later on.
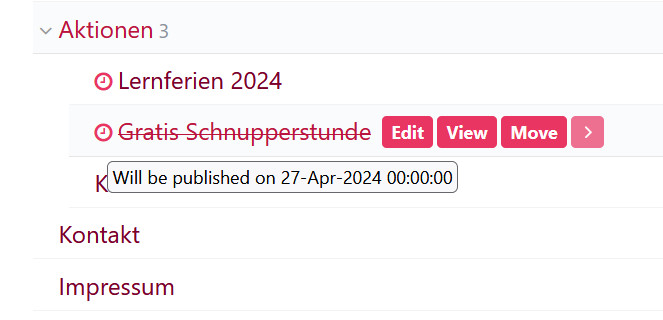
Icons in the page tree beside the page title on pages where the status will change in the future
If the status of a page will be changed in the future via Cronjob, you will see little clock icon next to the page title in the page tree. If you hover over this icon, you will get more information of what will happen.
Get additional status information inside the fieldset
Below the label of the publication fieldset, you will find information about the current publication status of the page and what will be changed in the future via cronjob. This means you are always up to date and you can see what things will happen in the future (changes that will be made via cronjob).
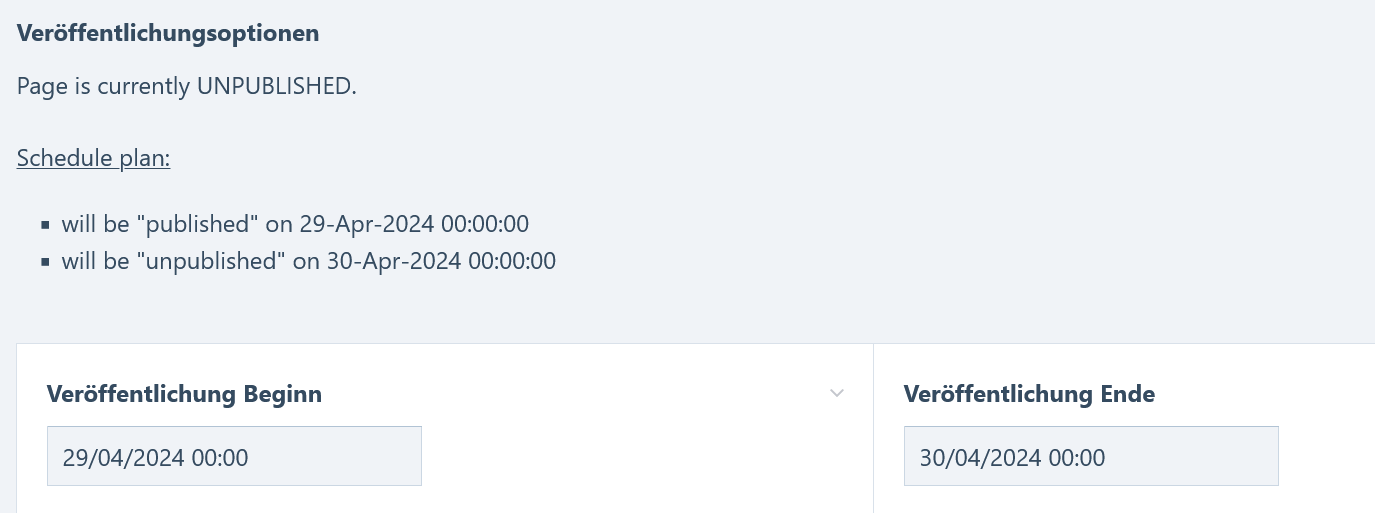
Get additional status information as a subheadline below the main headline
For better visibility for the editor of a page, the schedule plan information will also be displayed below the main headline.

Multi-language
This module includes the German translation file. You will need ProcessWire 3.0.195 or higher to import these translations to the created input fields too. The reason is that the processCSV method has to be hookable and this is only possible since the 3.0.195 version of ProcessWire. This Hook method will take care that the newly created fields will also be translated with one click after importing the language files. If your version is lower this module should also work, but you have to add the translations for these fields manually.
How to install
Download and place the module folder named "JkPublishPages" in: /site/modules/
In the admin control panel, refresh all your modules.
Find this module and click "Install". The module will be installed and all the input fields will be created.
After the module has been installed, you can make your settings.
Please note: This module needs LazyCron to be installed. If you want to install the module, but LazyCron is not installed, you will get a message that your system does not fulfill the requirements. You will get this message too if your PHP version is lower than 8. So if your PHP version is 8 or higher, you can ignore this message. LazyCron will be installed automatically during the module installation.
How to uninstall
Go to the module configuration and check the checkbox for uninstallation. All fields of this module will be removed from every template and will be deleted from the database afterwards.
More modules by juergen
FrontendLoginRegister
User login/registration component for ProcessWire using the FrontendForms module.9FrontendContact
Simple configurable and expandable contact form for ProcessWire based on the FrontendForms module.5Openinghours
Fieldtype that stores opening hours for each day of the week (including additional input field for holidays)5Image Placeholder
A configurable module for creating placeholder images by using TrueTypeFonts for the placeholder text3Publish/Unpublish pages
Publish/unpublish, delete or move pages depending on dates and times using LazyCron.3Fieldtype Object Dimensions
Fieldtype to store length, width, height and to calculate and store the volume and area of an object.2SnowFallAnimation
Module for creating and animating snowflakes on a web page using HTML5 canvas and JavaScript classes.2