This ElasticSearch module for ProcessWire CMS/CMF will sync your page content to an ElasticSearch index, which provides you a convenient way to search it.
Table of Contents
Features
- Batch add / updates pages in ElasticSearch
- Add / update page in ElasticSearch after page save/publish
- Remove page from ElasticSearch after trash, delete or unpublish page
Prerequisites
Before you'll start using this module, make sure it's compatible with your technical ElasticSearch setup and that it's fulfills your content indexing requires. We've created this module to support a bonsai.io (alternatives: AWS ES, Elastic Cloud, Google Cloud, etc.) hosted ElasticSearch SaaS instance. It should also work with own-hosted ElasticSearch instances or within Docker-Containers.
Usually ES SaaS providers inform about this in a setup/configuration section in their backend.
E.g. for bonsai.io: https://{ES_ACCESS_KEY}:{ES_ACCESS_SECRET}@{ES_INSTANCE_URL}.bonsaisearch.net
E.g. for local ElasticSearch: http://localhost:9200
Installation
- Execute the following command in the root directory of your ProcessWire installation:
composer require blue-tomato/elasticsearch-feeder
- ProcessWire will detect the module and list it in the backend's
Modules>Site>ElasticsearchFeedersection. Navigate there and install it.
Usage
To use this module you'll have to setup some module configurations and schema instructions.
NOTE: This module will save time of the last update for each page and the document ID in a meta field called elasticsearchfeeder_meta. You can access this value with $page->meta('elasticsearchfeeder_meta')
Configuration
Configure the module in your ProcessWire module backend (which will be available after the module was installed). The module configuration enables to do the following via a ProcessWire-driven backend form:
- define ES backend protocol (http or https)
- insert
ES_ACCESS_HOST - insert
ES_ACCESS_KEY(optional) - insert
ES_ACCESS_SECRET(optional) - insert the path to your schema (see Schema to see how those work)
- optionally insert a prefix string that'll be used when hashing your ES ids
- insert template configurations (see Schema to see how those work)
- (re)index all pages matching our module configuration by clicking the "Index All Pages" button. NOTE: using this option can take quite a long time (primarily depending on how much ProcessWire pages you're going to send to the ElasticSearch index).
- or use the batchSync.php script (description below)
Schema
Setup a schema or multiple schemas to define which content(s) will be shipped to your ElasticSearch instance. Consider to place your schema files with a .schema.php file ending in the directory path declared when configuring your module in the ProcessWire backend.
Basically said: for each ElasticSearch document type, there must be a PHP function returning the contents to be indexed in your ElasticSearch instance.
The naming convention of this function has to be the camelCased document type name you declare in the ProcessWire backend module configuration. So i.e.: a document type named news-details-page in the ProcessWire backend requires schema function named newsDetailsPage.
The filename itself has to be the same name as the template name. I.e.: news-details-page.php should be news-details-page.schema.php
Page Filtering in Schema
If a Schema Function returns false as value, the page will not be sent to ElasticSearch. You can use this for filtering your pages and sending only specific pages from this template to ElasticSearch.
Schema Function (i.e. news-details-page.schema.php)
This module passes the following arguments to your schema function.
- @arg1
$pagethe ProcessWire page WireArray
function newsDetailsPage($page) {

  // don't send page to Elasticsearch in case we don't want to
  if($page->property->value == "xyz") { return false; }

  // now start building the $document array you want to ship to Elasicsearch
  $document = [];
  $document['type'] = 'news-detailspage';
  $document['name'] = $page->title;

  // if you need to generate an ElasticSeach ID withtin a schema file
  $ElasticsearchFeeder = wire('modules')->get('ElasticsearchFeeder');
  $indexPrefix = $ElasticsearchFeeder->getIndexPrefix();
  $document['some_other_page'] = $ElasticsearchFeeder->createElasticSearchDocumentHashedId($page->get('some_other_page')->id, $indexPrefix),

  // send $document back to ElasticsearchFeeder module
  return $document;
}
Schema Function Debugging
This module provides a convenient way to debug your schema and thus see what's being sent to ElasticSearch. You can see this after saving a page in the ProcessWire admin message bar as JSON output.
To enable module debugging:
- go to the module configuration page in
Modules>Site>ElasticsearchFeeder - find the debug config area like shown below
Batch Sync via CLI or Cron
You can send your pages through the "Index all Pages" button in the module configuration page in Modules > Site > ElasticsearchFeeder. If you have many pages, this can run very long and it can cause server timeouts.
For this reason you can use the batchSync.php script in the module path via command line. You can also set up a repeating cronjob to ensure a full sync every x times.
The batchSync.php script send all pages to ElasticSearch.
I.e:
php site/modules/ElasticsearchFeeder/batchSync.php
To check if in ElasticSearch existing also still exists in ProcessWire and are public available use this script:
php site/modules/ElasticsearchFeeder/batchCleanup.php
Request to ElasticSearch through a proxy server
If you have your Server behind a proxy, you can add to your config.php file following properties:
$config->httpProxy = "your-http-proxy-server.xyz:8888";$config->httpsProxy = "your-https-proxy-server.xyz:5394";
Override ElasticSearch Connection through config.php
You can override your Connection to ElasticSearch through $config->elasticsearchFeederConnectionOverride. E.g. if you want to work local or on stage Servers with your local ElasticSearch Server but let the Database values untouched.
$config->elasticsearchFeederConnectionOverride = [
  "es_protocol" => "http",
  "es_host" => "localhost:9200",
  "es_access_key" => "",
  "es_access_secret" => ""
];
Deactivate ElasticSearchFeeder through config.php
If you want to prevent to send pages to ElasticSearch from your development or staging server but don't want to deactivate the module in the database, you can add $config->elasticsearchFeederDisabled = true to your config.php or config-dev.php file. This will prevent of adding the necessary hooks for the indexation.
Show ElasticSearch Meta Information / Status in ProcessWire Admin Panel
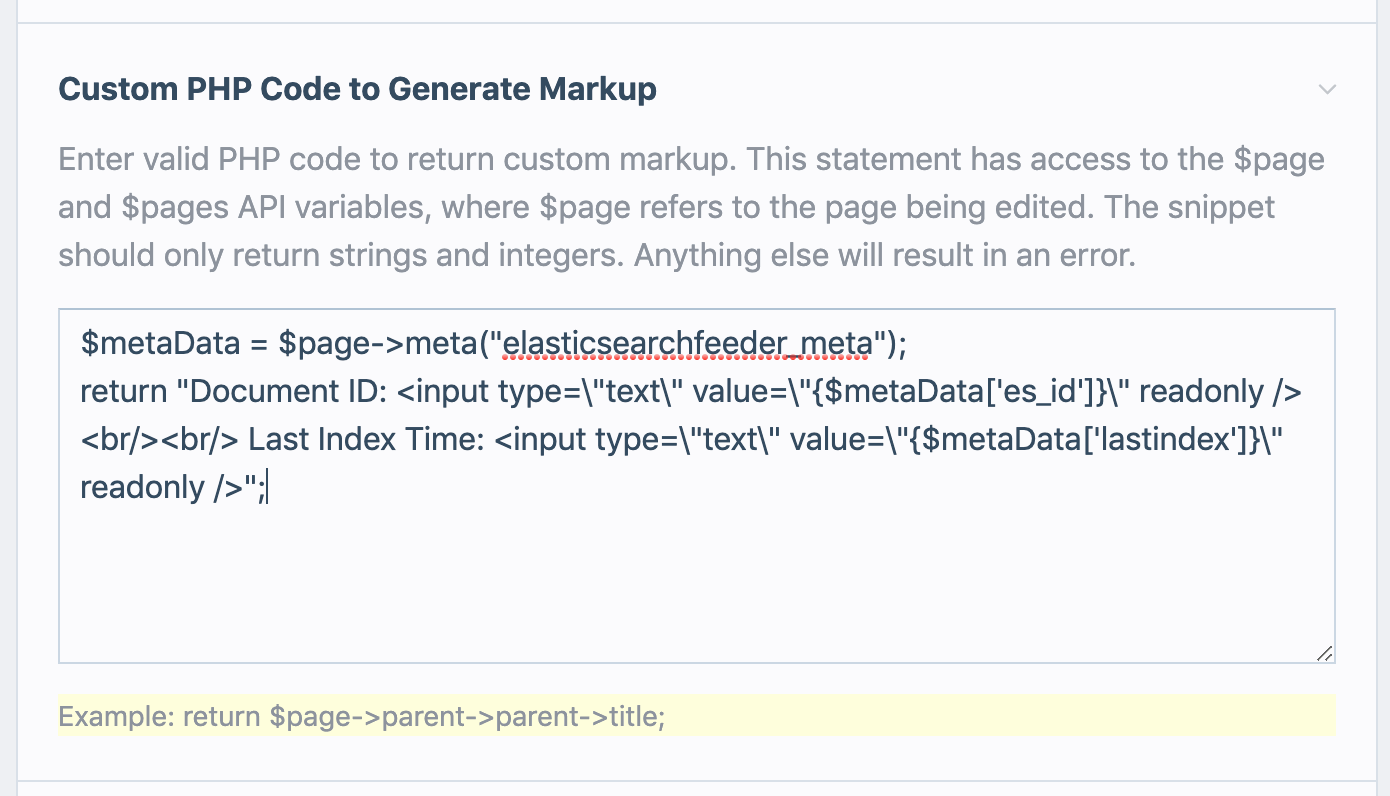
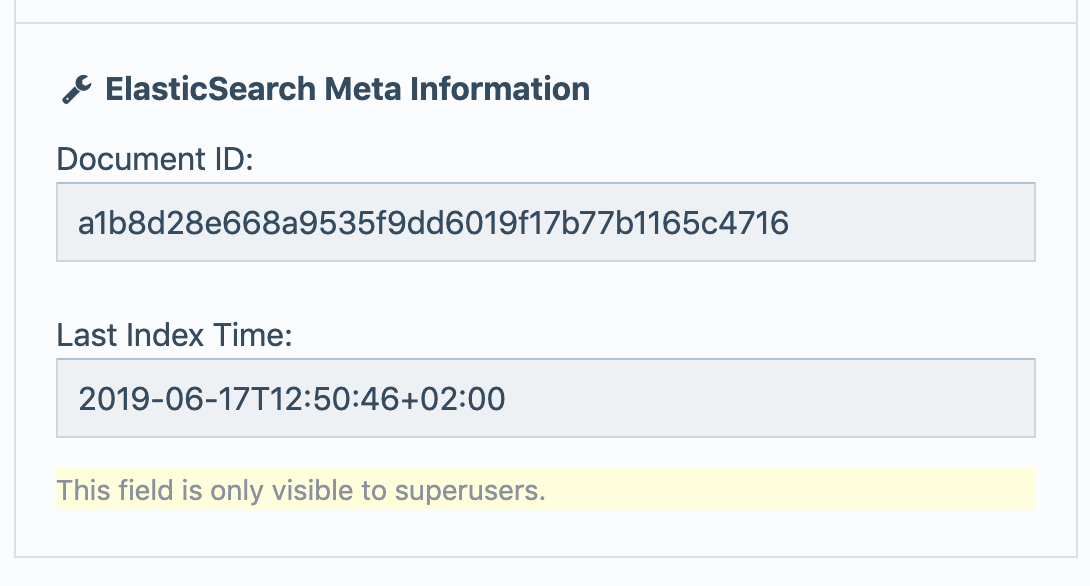
Since we save the document-ID and the last time when the page is sent to the index in the $page-meta(), you can show them also in the admin panel with MarkupRuntime Module.
Here is an example configuration for MarkupRuntime:


ElasticSearch Version and Document-Type
Please consider that ElasticSearch 6.0.0 removed the support for multiple document-types in one and the same index. We support both variants with this module. You can define for each ProcessWire template seperate index and document-type names. I.e. if you use ElasticSearch => 6.0.0, you can use the same name for index and document-type.
https://www.elastic.co/guide/en/elasticsearch/reference/6.x/removal-of-types.html
Support
Please open an issue for support.
Contributing
Create a branch on your fork, add commits to your fork, and open a pull request from your fork to this repository.
To get better insights and onboard you on module implementation details just open a support issue. We'll get back to you asap.
Credits
This module is made by people from Blue Tomato. If you want to read more about our work, follow us on https://dev.to/btdev
License
Find all information about this module's license in the LICENCE.txt file.
More modules by blue-tomato
- ImageBlurhash by blue-tomato
ElasticsearchFeeder
Schema-flexible module for getting your page into cloudhosted Elasticsearch like Bonsai or elastic.io.2ElasticsearchFeeder by blue-tomato- TemplateEngineMustache by blue-tomato
PageUseIdAsName
Overrides the name field (used for url) with the page-id and hides the field from the admin GUI1PageUseIdAsName by blue-tomato- ProcessLogstash by blue-tomato
Install and use modules at your own risk. Always have a site and database backup before installing new modules.
