Add multi-language translations to your module
To add multi-language translations to your module, you can export a CSV file of translations, give them names that reflect the language and copy them to /languages/ directory in your module’s files. We'll cover the details in 4 steps below.
Step 1: Locate and add your module’s PHP files to translate
Locate the PHP files you want to translate from your admin: Setup > Languages > language > Site files > Find files to translate. Select the PHP file(s) in your module you want to translate and then submit the form. ProcessWire will generate new empty .json files for the files you selected to translate.
Step 2: Translate your module’s files and then export to CSV
If you selected just one file above, it will take you there now. Otherwise, in Setup > Languages > language, click the "edit" link for file(s) added for your module. Once on the file translation screen, translate the text into the desired language and save. Near the top of the translation screen is a link to "Download" or "View" a CSV file of the translations. Click that to save (or view) the CSV file of translations.
Step 3: Copy the CSV file(s) to a /languages/ dir in your module
Copy the CSV file(s) or translations you exported in the previous step into a new /languages/ directory in your module’s files. For instance /site/modules/ProcessHello/languages/ is the one you'll see with the ProcessHello module.
While not required, you might consider naming your files with the ISO-639-1 language code. For instance, German would be de.csv, Spanish would be es.csv, Finnish would be fi.csv, etc. Regardless of what name you use, the goal is just simply that the filename should explain what language it is for.
A single CSV file can provide translations for multiple PHP files. So if your module happens to have multiple translatable files, you can bundle all the translations into a single CSV file (just copy and paste into one), or if need be, you can have multiple CSV files for each language. Though I prefer to keep it simple with one file per language.
Step 4: Tell the user how to install your translations
In your module’s documentation, instruct the user to install translations from your module’s info/config screen. It’s in the “Module Information” fieldset “Languages” row, where there is an “install translations” link. When new versions of your module update the translations, make note of that in your module's CHANGELOG.md file so that users will know to click the “install translations” again to update the translations.
How users can install a module’s translations
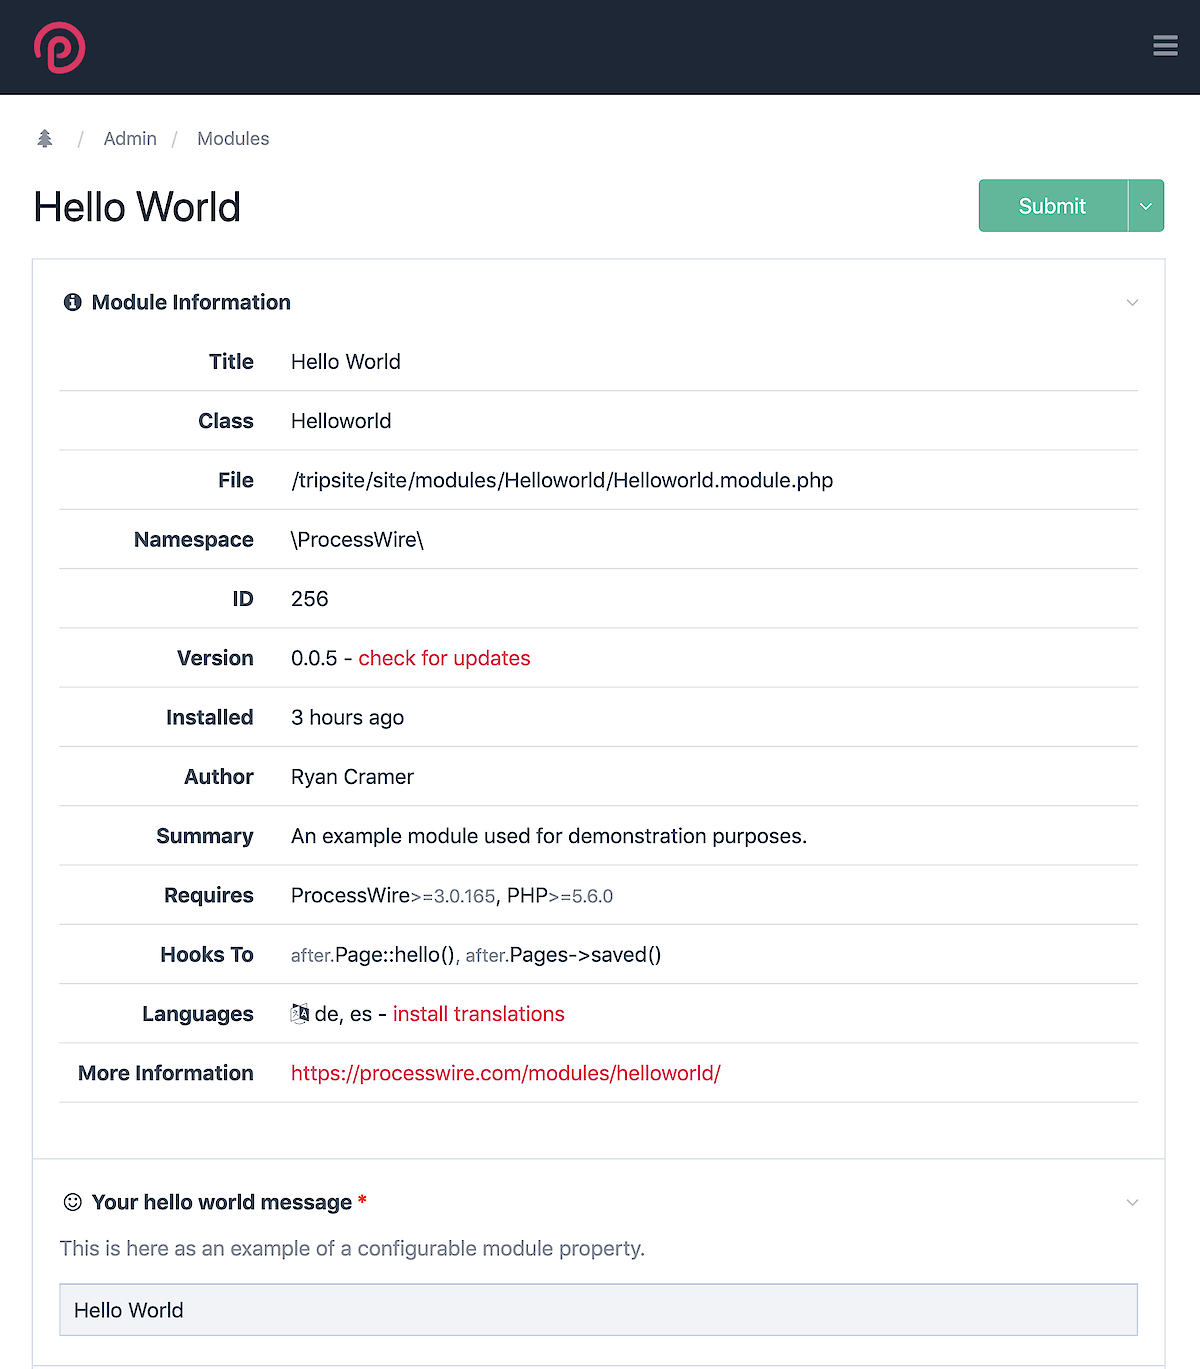
This is best demonstrated with a couple of screenshots. Below is a module’s configuration screen with the “Module Information” fieldset opened:

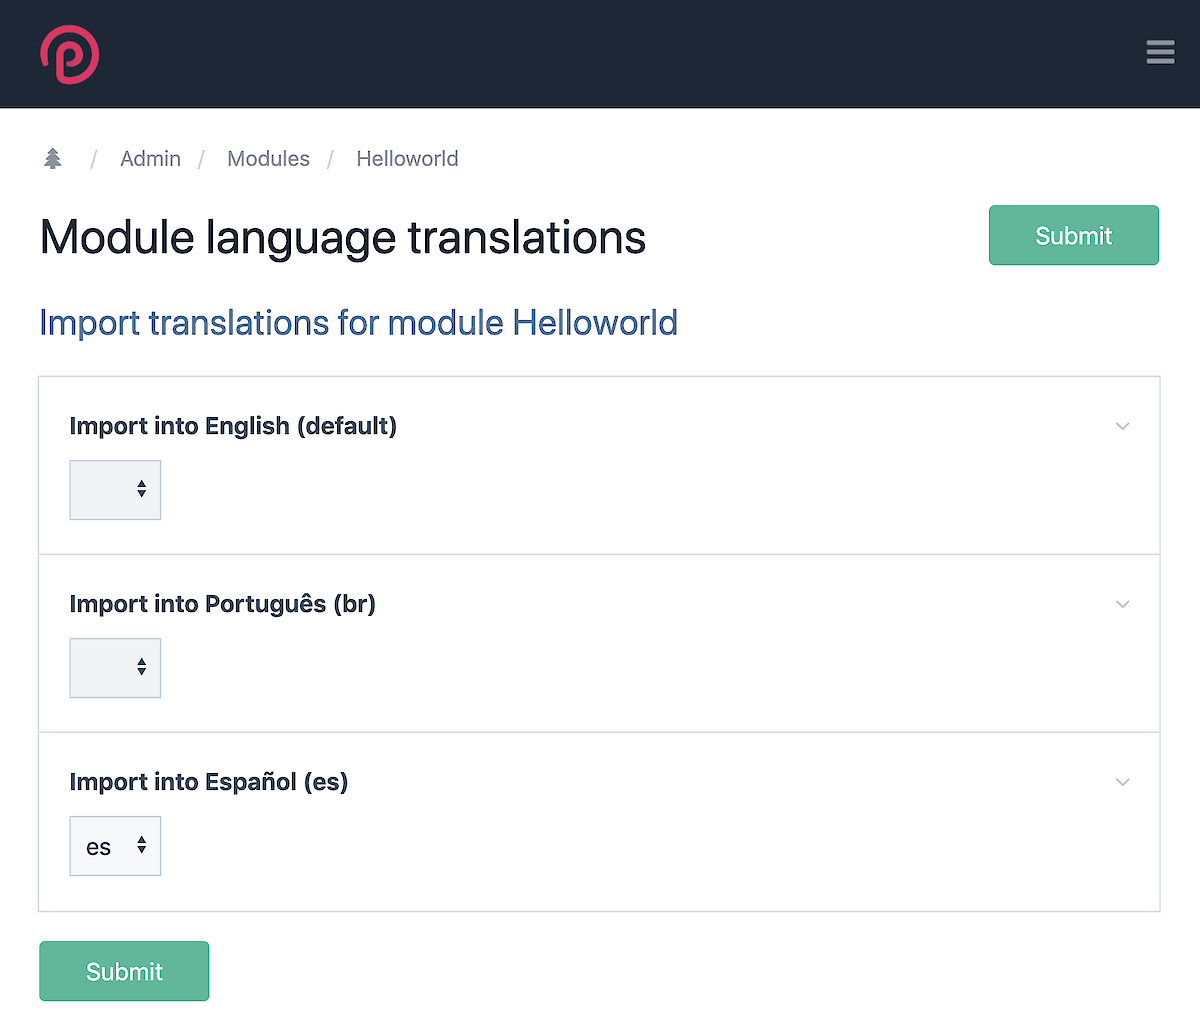
Note the second to last row in the “Module Information” fieldset above where it says “Languages”, followed by a list of languages it contains translations for. When you click the “install translations” link you are taken to this screen:

From here you can match the available translations with the languages you have installed on your site. In my case, I was able to match the “es” (Spanish) translation of the module with the Spanish version of the site. Once you click the Submit button, ProcessWire imports the translations and they take effect immediately.